
I have found the best way for me to learn how to do something is if someone shows me. If someone demonstrates the steps, I am able to catch on pretty quickly. That is what happened here. I checked out youtube and looked at few videos before I settled on one I liked.
I highly recommend this video by Maggie Weldon:
She is clear and easy to follow. Depending on your level of expertise and how you learn, you may prefer another video. To make the scarf pictured above, I used the Premier Starbella yarn Spring Bouquet and in the demonstration pictures I used Premier Starbella yarn Canyon Sunrise. I used my "N" hook for this pattern.
If for some reason the video is not working here is my attempt to show you how to make this scarf.
You will first spread the yarn apart. With ribbed side down and netting on top, you will count out 8 loops on the very top.

Fold in half the 8 loops in half over itself.

Put your hook through the first double loop, then the second and so on for the remaining double loops.


This is the start of the scarf. Now you must decide if you are going to do 8 or 10 loops (or if you are experimenting maybe more? Let me know if you do and how it turned out). You will skip the first loop and go into the second. That is one. Skip the next loop and going into the fourth. Repeat this until you get 10 loops. You should have 11 loops (counting the doubles as one).

Pull the last loop all the way through.
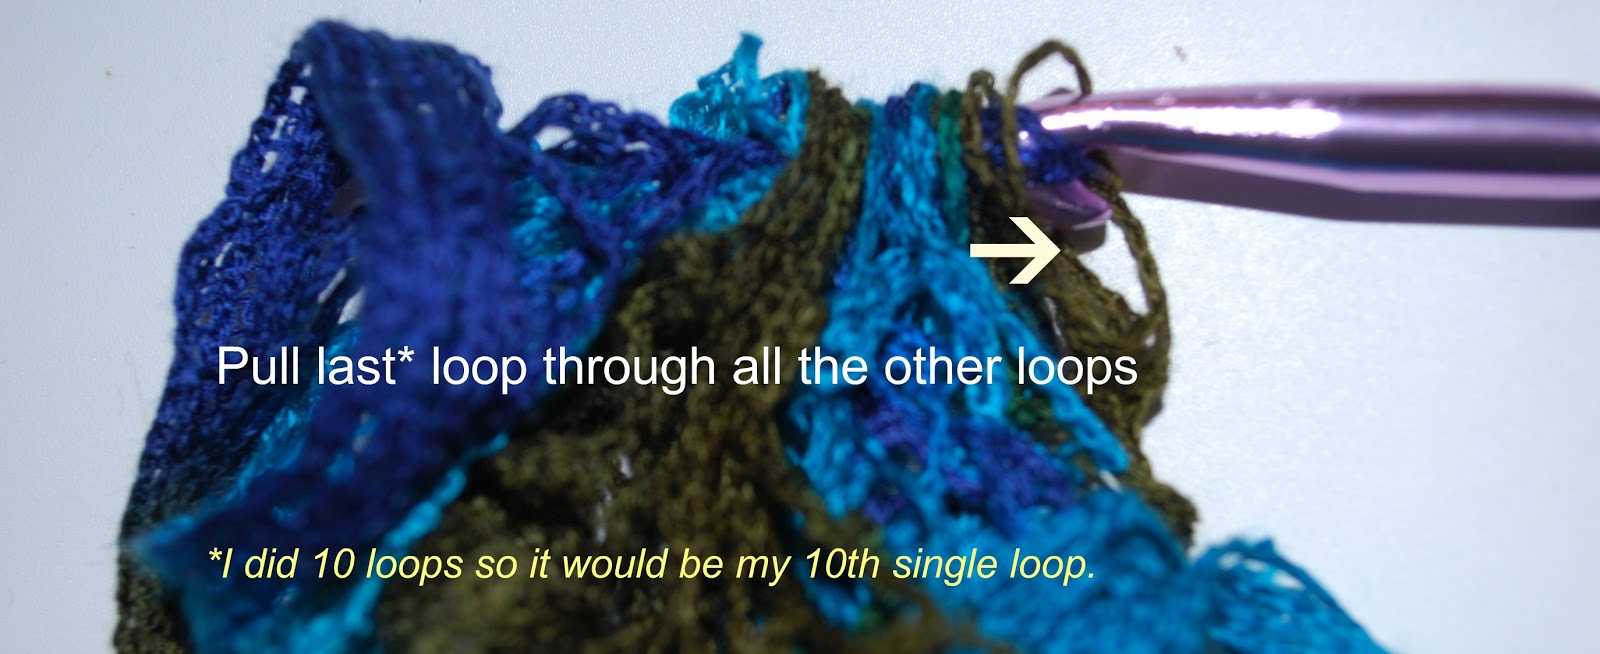
Skip the first loop and go into the second. Skip the third and go into the fourth and so on until 10. Pull the 10th loop through. Repeat this pattern until you get to the end.

Once you have reached the desired length of the scarf, you will wrap the ribbon around the needle.

Pull through the loop. It should be tight enough to stay. If you are making a shorter scarf you will need to cut the yarn giving yourself about an inch or so of slack to wrap and pull through the loop.

Maggie said that if you want the scarf to be more fuller to go for 10 loops, which is what I did. It was a little tricky to get the hang of it at first because this type of yarn curls up on you and you must keep it separated as you crochet. She did say it could be made in about 30 minutes. She is a pro, so yes if you are as well, that time would be about right. I would say for me it was closer to 45 minutes.
Here is the finished scarf!

Another scarf I made.

This one took me about 30 minutes. Happy crafting!!
I've made one for my sister for Christmas. I love them but I can never find the colors I want!
ReplyDeleteI know what you mean about colors! I went to four different shops!
ReplyDelete